The (Mostly) Dependency Free PowerShell Prompt - Part 1
The (Mostly) Dependency Free PowerShell Prompt
Table of Contents
Intro
Welcome to my multi-part series on prompts! I tried to do this in one go, and realized it was going to be way too big, please enjoy part 1! This is mostly about ANSI, and boy howdy is it fun!
Many of you, like myself, probably spend hours in front of your terminal. When we spend so much time in our terminal, hacking away at whatever, why should we settle for a drab, boring, and lacking prompt?
I was inspired to finally get off my rump and make a new prompt to replace my ~4 year old one I had been using. I had three goals.
- Finally incorporate the hotness of PowerLine fonts.
- Utilize ANSI escape sequences for some sweet colors.
- Remove my existing dependency on the posh-git PowerShell module for Git integration.
Cool, we have goals to work on. Let’s go!
The Old Prompt
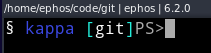
Here is the old prompt, fairly plain. If I recall I actually modeled it the way it is so that the posh-git integration looked more natural by having the square brackets.
Here it is in a normal directory then changing over to Git repository directory…
The Prompt
The way I had setup my old prompt, the prompt itself was broken into the following sections (based on the gif above).
| Section | Value | Description |
|---|---|---|
| Intro / Decorator | § |
No real value, just the start of my prompt, I picked it because it looked cool. |
| Machine Name | kappa |
I am probably just wasting space, but I liked having the machine name in the prompt. |
| Current Directory | [ephos.github.io] |
The in-the-box PowerShell prompt puts the whole path, I like to only know which current directory I am in. I put the parent path in the title bar of the terminal window.1 |
| Git (If in a Git repository) | [master ≡ +3 ~0 -0 !] |
This is where posh-git shines. When switching to a Git repository the posh-git adds information about current Git repository. |
The Title Bar
In the title of the terminal I also like to know what the parent path1 is for my current directory, what user I am currently running as and if it is Admin/Non Admin (at least on Windows).
The New Prompt
Let’s talk a bit about the two things that will make the new prompt more exciting, ANSI escape sequences and PowerLine Fonts.
ANSI Escape Sequences
When we talk about ANSI escape sequences, we need to talk about terminal emulators. Different terminal emulator applications support different ranges of color. Almost universally these days they will all support at a minimum 16 colors (4 bit). To really get a full range of colors we want a terminal emulator that supports “true color”, or 24-bit, which gives us a range of 16,777,216, wow! If you want to read more about colors and computers or terminal emulators and their support, check out the footnotes.23
Urxvt, which I used previously doesn’t easily support true color which is partly what prompted me to change over to Termite. If following along just keep in mind that the terminal emulator you are using may not support true color! If you are reading this as a Windows user you can safely continue to use the Win32 Console that PowerShell has always used as it supports true color!
ANSI escape sequences are a standard that most terminal emulators understand. They can be used to move the cursor, change lines, initiate a beep. All of what we will be doing to modify how text looks is with a CSI, or Control Sequence Initiator. This escape is created with ‘ESC’ followed by ‘[’ and will tell the terminal how to handle the text that comes after it. The codes can determine many things like color or how the text is rendered (bold, flashing, etc.).
I wrote briefly on these codes in my markdown post, let us take a closer look.
“Wait wait wait… How do I even type the ‘ESC’ key???” This is easier than it sounds, .Net can lend us a helping hand with the [System.Char] struct.

Yikes, there are lot of potential options, how do I know which one ‘ESC’ is? Pro-tip, just use a cheat sheet! Unicode.org is probably the authoritative source, but I find sifting through PDF files somewhat tedious, luckily there are no shortage of other cheat sheets like UnicodeLookup.com and Wikipedia to name a couple.
You can use either the decimal or hexadecimal codes with [Char], using capital ‘A’ below as an example…

Using the cheat sheet on Wikipedia, we can determine that ‘ESC’ is a hexadecimal of 0x1B or decimal of 27. Now we know how to “type” an ‘ESC’ character. We need to pair our ‘ESC’ with ‘[’ for the ANSI CSI escape sequence. Since we’re going to be doing A LOT of ANSI escaping, let’s put this into a variable. We can then easily append the rest of the sequence including the ‘[’ character4.
$charEsc = [Char](0x1b)
"$charEsc["  # ANSI CSI Escape.
"This will never be seen, this CSI code (ESC[2K) erases the whole line!" + "$charEsc[2K"
Very underwhelming, we can now construct an ANSI CSI escape sequences, but they don’t really help us make the prompt look cool. This is where SGR (Select/Set Graphic Rendition) parameters come into play. I know the lead up to this was… chewy, to put nicely, but you can have a lot of fun with these. They will generally be constructed the following way. Let’s use this example, ESC[1m we are using an SGR parameter of 1m…
| Section | Description |
|---|---|
| ESC | Hitting the ESC key tells the terminal that we are using an ANSI escape code. |
| [ | The opening square bracket indicates to the terminal we are using a CSI escape sequence. |
| 1 | The 1 SGR parameter tells the terminal to make text bold. You can set multiple SGR parameters in the same escape, they are separated by the ‘;’. |
| m | SGR codes end with ‘m’. |
Testing it out.
Examples you can just paste in.
# Bold Text
"$charEsc[1m" + "Bold!"
Clear-Host
# Underline Text
"$charEsc[4m" + "Underlined..."
Clear-Host
# Blink Text
"$charEsc[5m" + "Whoooooa dude!"
Clear-Host
# Red background and black foreground
"$charEsc[41;30m" + "The House Targaryen Motto: Fire and Blood!"
Clear-Host
# Multiple SRG codes
"$charEsc[1;4;35;46m" + "Do you like cotton candy?"
Clear-Host
You might notice you need to clear the host, or ctrl+c to revert. You also also use the SGR parameter for reset, which is 0 (ESC[0m).
"$charEsc[1;4;35;46m" + "Do you like cotton candy?" + "$charEsc[0m"
"$charEsc[42;30m" + "Unpopular opinion, " + "$charEsc[1;42;31m" + "no I do not!" + "$charEsc[0m"
This is a metric ton to try to remember, where do we find these SGR parameters? Luckily, like Unicode characters there are plenty of cheat sheets!
- Linux Man Pages - Console Codes
- Microsoft Docs - Virtual Terminal
- Wikipedia SGR Parameters
- Stack Overflow
Using the codes, we know that out of the box 30-37 and 90-97 give us the classic 16 colors! (Be careful of the ` to escape the $_)
Enough of these plebian 3/4-bit games, even more colors were promised! Give us 8-bit!
MORE MORE MORE!!! TRUE COLOR!!! TRUE COLOR!!!

This clearly bogged down my gif utility, and we don’t have all day to see all 16+ million colors, but you get the idea! If you want to play around with these SGR parameters for 4/8/24-bit colors this code is what was run in the gifs above!
# 3/4-Bit 16 color example
90..97 + 30..37 | ForEach-Object {"$charEsc[${_}m" + "Colors!"}

# 8-Bit 256 color example
0..255 | ForEach-Object {Write-Host -Object ("$charEsc[38;5;${_}m" + "Colors!") -NoNewline}

# 24-bit color example
for ($red = 0; $red -le 255; $red++){
    for ($green = 0; $green -le 255; $green++){
        for ($blue = 0; $blue -le 255; $blue++){
            Write-Host -Object ("$charEsc[38;2;$red;$green;${blue}m" + "COLORS!!! [R$red] [G$green] [B$blue]") -NoNewline
        }
    }
}
We now know how to use ANSI escape sequences and SGR parameters to create colors. I created this helper table with some examples of how to change colors.
| Code | Outcome | Example |
|---|---|---|
ESC[<30–37>m |
Set background color, to one of 8 colors | ESC[34m - This will set foreground text after it to blue. |
ESC[<90–97>m |
Set background color, to one of 8 ‘bright’ colors | ESC[96m - This will set foreground text after it to bright cyan. |
ESC[38;5;<N>m |
Set foreground color, N is a value between 0-255 depending on the color. | ESC[38;5;125m - This will set set the foreground text after it to a pink-ish color. |
ESC[38;2;<R>;<G>;<B>m |
Set the foreground color, R,G, and B are values between 0-255. | ESC[38;2;122;23;216m - This will set the foreground text after it to a purple color. |
ESC[<40–47>m |
Set background color, to one of 8 colors | ESC[42m - This will set foreground text after it to green. |
ESC[<100–107>m |
Set background color, to one of 8 ‘bright’ colors | ESC[105m - This will set foreground text after it to bright magenta. |
ESC[48;5;<N>m |
Set background color, N is a value between 0-255 depending on the color. | ESC[48;5;78m - This will set set the foreground text after it to a pale teal-ish color. |
ESC[48;2;<R>;<G>;<B>m |
Set the background color, R,G, and B are values between 0-255. | ESC[48;2;189;78;110m - This will set the foreground text after it to a pink color. |
We can also mix codes together in 1 escape. For example to make purple text on a pink background using the RGB true color SGR parameters we can use ESC[48;2;189;78;110;38;2;115;23;221m"

Phew… Now that we can see how to use these ANSI escapes, we can do some sweet stuff with colors!
PowerLine Fonts
Now that we know how to do colors, we need a nice font. I won’t get too into the weeds of this install because it is fairly easy. Honestly it is going to be different depending on if you are running Windows, Mac, or even different Linux distributions.
Windows
If you are on Windows you can clone it down and run the included ps1 script.
git clone https://github.com/powerline/fonts.git
Set-Location -Path ./fonts/
./install.ps1
Arch Linux
Arch Linux has the latest version of the fonts in the AUR (Arch User Repository).
# Install the PowerLine fonts (using the yay AUR helper)
yay -Su powerline-fonts-git
Debian, Ubuntu, and Fedora
Debian, Ubuntu and Fedora can easily install the PowerLine fonts from their respective package managers as well.
# Debian/Ubuntu
sudo apt-get install fonts-powerline

# Fedora
sudo dnf install powerline-fonts
Manual Linux
Similar to the Windows install, there is an included shell script.
# Git Clone
git clone https://github.com/powerline/fonts.git --depth=1
# Go into the directory and run the shell script
cd fonts
./install.sh
The next step is to tell your terminal emulator application to use a PowerLine font. On Windows you would go into the properties of the console and change the font. When in the console right click and go to properties
To change the font for Termite we need to modify the Termite configuration file which should be at ~/.config/termite/config. Find the line that says font and update it to use one of the PowerLine fonts. In my configuration I use Noto Mono for Powerline 12. This sets the font to the Noto Mono for PowerLine at size 12.
font = Noto Mono for Powerline 12
I am only going to cover the Windows Console and Termite here, presumably if you are using another terminal emulator you are familiar with how to change the font, if not it probably has some great documentation somewhere on how to do it.
Now that we have one or more PowerLine fonts installed and configured out terminal to use it, what does it add? A few nifty characters.
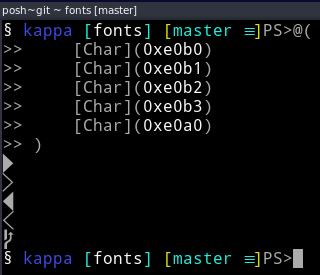
“How would we use these arrows though?” They will be the transition characters from one part of the prompt to the next!5
The Prompt
This is where we have to leave off for now! The next post will take a large chunk of what we did here to build a sweet prompt though! A sneak peak, it involves script blocks!
To Be Continued…
Stay tuned for Part 2!
Update - 7-4-2019
Reddit user /u/TheIncorrigible1 pointed out a couple of things.
VTY escapes are only supported in a more recent release of Windows 10 in the conhost (like 1803 it was introduced)
I had thought these were supported before that, turns out I was wrong! So if you’re a Windows users on an version of Windows 10 prior to 1803, the VTY escapes won’t work!
If you’re on PowerShell Core, the ESC character now has an escape sequence:
I wasn’t aware PowerShell (Core) had a new escape sequence for the ESC character! You can use `e as an escape, maybe the escape sequence `e[m. If you’re not using Windows PowerShell you may find this easier, you always have the alternative for compatbility between Windows Powershell and PowerShell (Core).
I also updated the syntax above to use ${_}m syntax. This should make the code look a little less confusing than the $_`m it used to have. Thanks /u/TheIncorrigible1!!!
-
So you might look at these screen captures and think that it looks like the whole path is shown. It is. I recently switched from Urxvt to Termite and I don’t recall if the issue existed before. I do know that the parent path is displayed properly in a Windows terminal. Mark this one down as a bug I need to fix! ↩ ↩2
-
There is a lot of good information on color depth. These Wikipedia pages are great for understanding how machines are able to get 16, 256, 16 million, etc. color ranges.
-
If you live in the world of Windows you are probably running PowerShell in the Win32 Console (Windows Console), which supports true color. However there are numerous alternative options of terminal emulator applications for all operating systems. They all have different capabilities, for instance as stated in the article some don’t support true color (like Urxvt).
-
Nothing is stopping you from also using
[Char]to display the ‘[’ however I find it adds a little bit more complexity than needed. You could also build the ‘[’ into your variable, so you don’t always need to include it. These choices are up to you and what you find easiest, after all, it’s your prompt! ↩ -
If you like Powerline fonts, check out Nerd Fonts for even more options! Instead of having triangle shaped transitions you can have flames! ↩
Featured Comments